So as I said previously my parents were out of town so they had me up to house sit the crazy dogs. Before they left I bought the newest cooking light magazine cause they have so many good recipes. Anyways my dad was flipping through it and said " i want this upon my arrival home sunday night." Of course my automatic response is "u wish!" ...but then I thought that would be nice of me, it does sound good, and I can add one more thing to my blog. So surprise here it is, and yes it was very very good. Not to mention my mother has a camera so I was able to actually take my own picture of this dish:)
Serves 4
Adapted from Cooking Light
The Ingredients
2 tablespoons olive oil
3 tablespoons all-purpose flour
1 cup fat-free chicken broth
1 cup yellow onion, chopped
4-ounces smoked ham, chopped
1 yellow bell pepper, chopped
2/3 cup celery, diced
1/2 teaspoon dried thyme
4 garlic cloves, minced
1/2 pound fresh okra pods, sliced
1/4 cup water
1/2 teaspoon cayenne pepper
1/2 teaspoon paprika
1/2 teaspoon ground black pepper
1/4 teaspoon salt
1/4 teaspoon ground allspice
1(28-ounce) can diced tomatoes, drained
1 pound pre-cooked, tailless big shrimp
2 tablespoons fresh flat-leaf parsley, chopped
Grits:
2 1/2 cups water
3/4 cup quick-cooking grits
1 cup fat-free Greek-style yogurt
1/2 teaspoon salt
1/2 teaspoon ground black pepper
The Process
1. Heat 1 tablespoon olive oil in large sauce pan. Add flour and cook for 1 minute or until lightly browned and stirring constantly with a whisk.
2. Add chicken broth and stir with whisk until thick. Pour into a bowl and set aside.
3. Wipe same pan clean with paper towel. Heat up last tablespoon of olive oil in pan over medium heat.
4. When hot add onion and ham, cook for 10 minutes stirring occasionally.
5. At this point start boiling water for grits, when boiling gradually whisk in the grits, then cover and reduce head to a simmer. Simmer for 8 minutes or until thick.
6. After ham and onion cook for 10, add yellow bell pepper, celery, thyme, garlic and okra. Cook this for 5 minutes, stirring occasionally.
7. Add broth mixture, water, cayenne, paprika, ground black pepper, salt, allspice and tomatoes.
8. Bring to boil and then simmer for 10 minutes. Then stir in shrimp, cook for 4 minutes. Sprinkle with parsley in end.
9. Put grits in bowl and put gumbo with parsley over that.
Some nutritional info as well:
calories 300, fat 10.5g, saturated fat 1.4g, protein 26.6g, fiber 7.3g
Cilantro is hands down one of the most amazing ingredients to cook with, of course along with garlic. This is a cooking blog with great recipes I create and adapt. The recipes on this blog are healthy and gluten free 75% of the time. The key to the organization of my recipes is color. Each one will be assorted by color, this is for the more visual cooks out there, or just the curious ones. To the right under labels you can search my recipes by keyword.
Tuesday, March 30, 2010
Healthy Chocolate-Walnut Cookies
So these are damn good! I'm surprised, without looking for healthy cookies I came across these! I was searching out some super amazing chocolate heaven...thus the cookies. And if you haven't noticed I really don't like baking except for pies and I don't even like sweets, so recipes like these will be far and few between sorry.
Makes 20 big cookies (they spread out a lot)
From Epicurious.com
The Ingredients
Parchment paper
2 1/2 cups walnut halves, finely chopped
3 cups confectioners' sugar
1/2 cup plus 3 tablespoons unsweetened cocoa powder
1/4 teaspoon salt
4 egg whites
1 tablespoon vanilla extract
The Process
1. Position 2 racks in the upper and lower thirds of the oven. Heat oven to 350F degrees.
2. Line two large baking sheets with parchment paper.
3. Put walnuts on baking sheet and toast, about 7 minutes, let cool.
4. Mix sugar, cocoa and salt in bowl.
5. Then add in walnuts egg whites and vanilla. Beat this together with fork until sugar mixes in but don't over beat and let the batter get stiff.
6. Put 1/2 tablespoon of batter per cookie on to baking sheet with parchment paper.
7. Bake about 15 minutes or until tops of cookies are glossy and cracked.
Eat all of them with milk!
Also some nutritional facts and though it is per cookie think about all the other bad cookies in the world:
55 calories, 3.3g fat, 0.4g saturated fat, 0.6g fiber, 1.2g protein
Picture from: http://www.glamour.com/health-fitness/blogs/vitamin-g/2009/12/afternoon-snack-flourless-choc.html
Pork and Vegetable Pot Stickers and Spicy Dipping Sauce
Let me preface this post with we went to Uwajimaya. And of course I wanted to buy everything! We did get a little can of supposed pineapple juice with coconut pulp....tasted more like corn syrup and gelatin blarg! Anyways I decided I wanted to make pot stickers upon seeing the gyoza wrappers. So from there I thought about what I wanted to stuff the pot stickers with and I decided on the rest of the ingredients. Might I add, I made these while house sitting for my parents and they have all the best pans and cooking supplies so I was in heaven!
This is my own recipe:)
Serves 4 (makes 40 pot stickers)
Ingredients
1 pound lean ground pork
1/2 of one radicchio, finely chopped
4 green onions, finely chopped
1 1/2 large carrots, grated
1 1/2 tablespoons ginger, grated
3 cloves garlic, minced
1 tablespoon rice vinegar
1 tablespoon soy sauce
1 1/2 tablespoon sriracha sauce
1 teaspoon ground black pepper
1 package of gyoza wrappers (the circle shaped kind)
2 tablespoon olive oil
For dipping sauce:
1/3 cup soy sauce
2 1/2 tablespoons unseasoned rice vinegar
2 teaspoons garlic chili paste
1 tablespoon ginger, grated
The Process
1. In big bowl add ground pork, radicchio, green onions, carrots, ginger, garlic, rice vinegar, soy sauce, sriracha sauce, black pepper and mix very well.
2. Lay out 40 gyoza wrappers on a clean/dry counter top, and add a half a tablespoon of meat mixture in the middle of each wrapper.
3. Wet the edge of the gyoza wrapper with water and fold over meat to create a half circle. Gently press down on edge to make sure the wrapper is sealed around meat. Do this with all 40 wrappers.
4. Put large skillet on stove add the olive oil and heat over medium heat. When hot put each pot sticker in pan standing upright. This means the edge that you sealed will be sticking up in the air.
5. When each pot sticker is golden on the bottom, then put in 1/2 cup water and cover pan immediately in order to steam the pot stickers.
6. When all water has evaporated then pot stickers are done. About 5-6 minutes.
7. Make the sauce. In a small bowl combine soy sauce, rice vinegar, garlic chili paste and ginger. Mix well and eat tons!
Note that I call it spicy dipping sauce...that means it is spicy...pretty damn spicy so use less garlic chili paste if you can't handle it:) Also the pot stickers did tend to stick to the pan so be ready for that and expect to soak the pan afterwords...and yes there might be a couple of pot stickers that rip because they are so stuck, but don't worry it's not the end of the world. Once again I also had trouble deciding what color these pot stickers are because they are fried and steamed. So while in truth they are more of a beige color, I am going to put them in the golden section because honestly what sounds more appetizing beige or golden pot stickers?....my point exactly. And while these are fried it is for a brief second and the pork is lean, so this is once again a healthy meal!
Picture from: http://www.tasteto.com/2008/01/16/snack-time-feature-the-search-for-fresh-east-asian-treats-part-1-of-2/
Lime Vinaigrette
This was a nice salad dressing that I used on a simple salad along with the steak I made my brothers.
Makes a bowl full
The Ingredients
1/2 cup olive oil
2 tablespoons lime juice
1 tablespoon red wine vinegar
1 teaspoon minced garlic
1/2 cup cilantro, chopped
1 teaspoon chili powder
Salt and pepper to taste
Mix Well. and enjoy
Picture from: http://groceryguide.com/a/freshproduce/
Makes a bowl full
The Ingredients
1/2 cup olive oil
2 tablespoons lime juice
1 tablespoon red wine vinegar
1 teaspoon minced garlic
1/2 cup cilantro, chopped
1 teaspoon chili powder
Salt and pepper to taste
Mix Well. and enjoy
Picture from: http://groceryguide.com/a/freshproduce/
Labels:
gluten free,
green,
mexican,
paleo,
vegan,
vegetarian
London Broil withh Soy Citrus Mayonnaise
Part of another lovely sibling dinner. So every other Wednesday I have dinner with my older and younger brothers. It is pretty much wonderful...it started out with us trying out various Pho restaurants and in general it is focused around us eating at restaurants. This night was different. As I said before it is beef week and who better to eat my beef and judge it but my brothers. They are the perfect judges because they also grew up on my father's amazing meats. Amazing meats includes everything from marination, cooking, grilling, resting, cutting...EVERYTHING; so they know what good beef is. I will start this with I got props for the meat!
Serves 3, full to the brim
From Gourmet Today (the new cookbook)
In the oven, not on the stove top like the original recipe says
The Ingredients
3/4 cup soy sauce
1/2 cup dry red wine
1/3 cup orange juice
1/4 cup lemon juice
3 tablespoons olive oil
1 bunch green onions, chopped
5 garlic cloves, minced
1/2 teaspoon ground black pepper
1/2 teaspoon cayenne pepper
3 pounds top round beef
1 cup smart balance mayonaisse
The Process
1. Mix together the soy sauce, dry red wine, lemon juice, orange juice, olive oil, green onions, garlic, black pepper, cayenne.
2. But beef into the mixture above and marinate at least 2 hours.
3. Heat oven to broil. Take beef out of marination and put in baking pan (greased).
4. Broil each side about 6 minutes. (This is for a 1 inch thick top round).
5. In the mean time bring the leftover marinade to a boil and boil for 1 minute.
6. Mix one cup of mayonnaise and about one cup of marinade to create cream sauce for top of steak.
7. When steak is done take out and let rest for 5 minutes and then cut against the grain and serve with sauce.
This was sooooo good. I also made a quinoa bake to go with it and I didn't like it, too much adobo flavor so I will not put it up.
Picture from: http://www.rockymtncuts.com/catalog/product_info.php?cPath=24&products_id=46
Monday, March 22, 2010
Corned Beef Brisket
I do realize that this is the first beef product I have put on my blog. I absolutely love beef and I was raised on red meat. The thing is, is that my significant other does not eat beef simply because he claims that the texture is like a wet towel! I keep trying to convince him otherwise especially since the meat I make in general does not have that texture because it is extremely important to not over cook meat, moisture is the key to any cut or kind of meat. Plus I love cooking for others so if I make a nice piece of beef I will be the only one eating it and honestly I find no joy in that. This week will be different, my boyfriend went to visit his family...so get ready here comes the beef!
Serves 5
Adapted from Sunset
Ingredients
1 piece (3.4lbs) of corned beef brisket
1 lemon, thinly sliced
1 medium yellow onion, thinly sliced
1/4 cup Dijon mustard
1/4 cup brown sugar
The little spice packet that comes with the corned beef
The Process
1. Set oven to 325F degrees
2. Rinse the corned beef off thoroughly under cold water to rinse away extra corning salt.
3. Trim off extra fat on brisket, but leave the fattiest side alone (need fat for cooking).
4. So a roasting pan is what is suppose to be used for this, but since I don't have one yet I used a semi-deep metal pan that was big enough to easily fit the brisket, and a stove top vegetable steamer (the kind that looks like a silver little spaceship when closed). I simply placed the spaceship in the metal pan and opened it up as a platform to set the brisket on, fatty side up.
5. Next I placed the onion and lemon all over the brisket (top and sides). And I sprinkled the little spice pouch over the top of the onions and lemons that were on the brisket.
6. Next I boiled water to put in the bottom of the pan, as much as you can fit without letting it touch the bottom of the brisket (about 4 cups).
7. Then cover the entire pan with tin foil. Then bake till brisket is tender 3 1/2 hours (1 hour per pound).
8. In small bowl mix together Dijon mustard and brown sugar.
9. Take brisket out of oven after 3 1/2 hours and turn oven to broil.
10. Take off tin foil and spread mustard mixture over the top of the brisket (over onions and lemons).
11. When oven is hot enough put brisket back in and broil until mixture becomes golden about 8 minutes.
12. Take out and let meat rest for 7 minutes. Then cut 1 1/2 inch think slices against the grain and eat lots!
Lets go beef! I could use some more iron anyways....
Might I add a friend also made a DELICIOUS shepherds pie to accompany this wonderful st. patty's day meal.
Picture from: http://www.locokinegrindz.com/2010/food-101-st-patricks-day-corned-beef-cabbage/
Labels:
Beef,
dinner,
gluten free,
irish,
pink,
St. Patty's day
Red Cabbage Salad
Ok here is the start of the long over due St. Patty's day meal. I had a long weekend full of library school presentations and my lovely friend Branden who just got back from south Korea and came to visit...thus the blog gets neglected. Also might I add that while red cabbage is called red cabbage...it is truly a purple color, so I have been having some trouble with deciding what color to catalog this recipe under. This salad was really good and not overwhelming with flavor. A nice light salad to go with mounds of corned beef.
Adapted from Sunset
Serves 8 as side dish
Ingredients.
1 head red cabbage, thinly sliced
6 tablespoons rice vinegar
1 tablespoon sugar
2 teaspoons creamy horseradish
1/2 red onion, finely chopped
2 firm-ripe Bartlet pears, cut into bit size pieces
Salt and pepper
The Process
1. In a big bowl mix together the cabbage, onion, and pear and set aside.
2. In a small bowl mix together rice vinegar, sugar, creamy horseradish.
3. Dress salad right before serving. Add the liquid mixture to the big bowl and mix thoroughly so everything is coated. Then add salt and pepper to taste and mix again.
Might I add if you are not a fan of the raw cabbage taste then don't make this and try to like it...cause you won't. But if you have mature taste buds you are in the clear hahaha j/k (ew! I hate it when people say that, but I had to since this is digital communication). Also the cabbage is very much purple, so that is my final decision.
Picture from: http://www.seedfest.co.uk/seeds/cabbage/cabbage.html
Sunday, March 14, 2010
Salmon Cakes with Asian Sauce
So I have been super sick with strep throat, hence the zero recipes that have been posted since. Wednesday evening my throat started hurting and by Thursday morning I couldn't even swallow. I'm still trying to get over this horrible sickness but now I'm worried it might be turning into meningitis. Apparently splitting headaches that feel like death are a symptom and strep can turn into that. So once again back to the doctor tomorrow. Anyways after being in bed for 96 hours (4 days) I decided though I don't feel great I need to get the hell out of bed, so I did and made some food with friends. I assured them I was no longer contagious and began making my own version of salmon cakes the same recipe works with crab too.
Serves 4 (2 cakes each)
Ingredients
2 large eggs
3 5-ounce cans of pink salmon (boneless and skinless), drained
10 whole wheat Ritz crackers
2 teaspoons Colman's dry mustard
1/2 large yellow onion, finely chopped
2 tablespoons cilantro, finely chopped
1/2 tablespoon garlic salt
2 teaspoons Nature's Seasoning (by Morton, Optional)
1/4 cup mayonnaise (Smart Balance is fine)
2 teaspoons toasted sesame seed oil
2 teaspoons wasabi
Pepper
Olive oil
The Process
1. Put little oil in skillet over medium high heat, when hot add the yellow onion. Saute until soft and semi-translucent about 4 minutes.
2. In large mixing bowl add salmon, onions, eggs, crackers, cilantro, garlic salt, dry mustard, nature's seasoning, and pepper to taste. Mix well.
3. Take a small handful of salmon mix and make a cake about 2 inches thick and 4 inches diameter (does not need to be precise). Like the size of a small cookie but thicker. Do this with all the mix and set aside.
4. Add a generous amount of oil to large skillet, set over medium heat.
5. Add as many cakes that fit comfortably to skillet when hot. Cover skillet and cook each side about 6 minutes or until golden brown. You can turn up the heat to quicken the process if need be.
6. For sauce mix mayonnaise, sesame oil and wasabi.
These cakes are my Asian style of salmon cakes. Often times I just put flat leaf parsley in place of the cilantro and I don't make a sauce. The cakes are good enough to not even have a sauce, a drizzle of lemon and pepper tastes great on top too. As an end note today I went to a new breakfast place on N Lombard called "The little red bicycle cafe." It is amazing! I got the Oregon tuna melt which was made with fresh albacore, a special homemade relish, lemon mayo and many other great things. My boyfriend got the biscuits and rosemary mushroom gravy which was also extremely tasty. I highly recommend this place but be ready for lots of people. Next we decided to go to the Portland Nursery, one of my personal favorites. Though it is a little early to start gardening I bought some herb starters, other wise I grow most everything else from seeds. Pretty much I can't wait to start my garden again yeah!
Picture from: http://www.flickr.com/photos/danwashburn/3007727152/
Wednesday, March 10, 2010
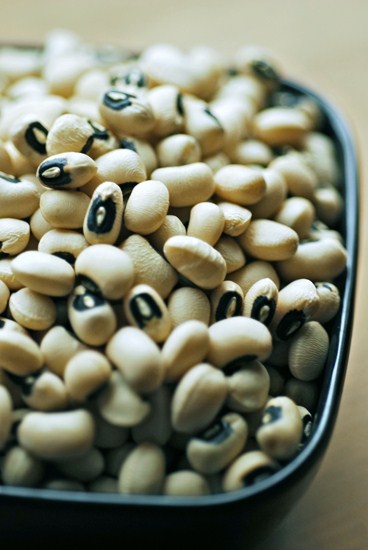
Black Eyed Pea Salad
Who doesn't love black eyed peas? And by peas they mean beans right? Damn the "they." This salad I have yet to taste the finished product because it has to marinate 12-24 hours. I did taste it after assembling and I liked it, so I'm assuming that it will be 10 times better in the end. When has marination ever failed? It hasn't...yet and hopefully never does. I will probably make pork loin to go with the salad but for an even lower fat and quick meal I would just added one can of tuna (after marination). Yum tuna...one of my favorite snacks is one can of tuna dowsed with A1 sauce. This may sound disgusting to you and if you don't like A1 you will hate it. But the odd snack is very filling and scrumptious so don't hate. Here's the salad.
Adapted from Seriouseats
Serves (not sure) I would say 5 as a side dish
Ingredients
3 15-ounce cans of black eyed peas, drained and rinsed
1/4 cup red onion, finely chopped
1/2 red bell pepper, finely chopped
3/4 cup cherry tomatoes, quartered
1/4 cup flat leaf parsley, finely chopped
1/4 cup balsamic vinegar
1/4 cup olive oil
Salt and pepper
The Process
1. In a large tuber-ware container add black eyed peas, red onion, red bell pepper, cherry tomatoes, parsley, vinegar, oil, and salt and pepper to taste.
2. Mix well and put in refrigerator to marinate for 12-24 hours.
Picture from: http://cravessoulfood.com/?p=433
Semi-Homemade Pizza
I chose this title because I despise that woman on the food network that has that dumb show called "semi-homemade"...but I'm not saying I am like her, I'm doing it despite her. I decided I wanted a good old fashion pizza and movie night (like the ones you had when you were a kid with the family). So we rented the movie "white noise" a pretty scary movie about EVP with Michael Keaton. Nice night for a movie and pizza because it was pouring rain outside....in Oregon....imagine that. So this pizza is simple and easy but once again it turned out especially tasty so here it is.
Slightly adapted from my parents recipe
Serves 4 (2 pieces each)
Ingredients
1/2 large yellow onion, chop coarsely
8-ounces chicken broth
1 bag Trader Joes wheat pizza dough
1/2 bottle pizza sauce (squeeze bottle)
1 tablespoon olive oil
1 1/2-ounces goat cheese
2 cups shredded part-skim mozzarella cheese (I love cheese, so it isn't necessary to use the 2 full cups)
2 tablespoons parmesan cheese
3 tablespoons fresh basil, finely chopped
1/4 cup cherry tomatoes, quartered
1/4 cup broccoli, chopped
4 chicken tenders, frozen (thawed is fine too)
1/4 cup marinated artichoke hearts, chopped
The Process
1. In medium saucepan, add chicken broth, yellow onion, 3 cups water, and chicken tenders. Bring to boil and then simmer for 20 minutes.
2. In the mean time heat oven to 450 degrees. Follow the directions on the Trader Joes dough, and roll out on baking sheet.
3. Spread the olive oil over the rolled out dough, then sprinkle with parmesan.
4. Bake dough for 5 minutes, take out and pop any bubbles that may have formed.
5. In a small skillet, add a drizzle of olive oil and turn to medium heat.
6. When skillet is hot add broccoli and saute about 5 minutes, or until al dente.
7. Take poached chicken out of saucepan and cut into bit size chunks.
8. Spread pizza sauce on dough. Sprinkle goat cheese, and mozzarella over pizza.
9. Put on pizza: basil, chicken, broccoli, tomatoes, and artichoke hearts.
10. Put pizza in oven and bake until crust is golden brown and the toppings get a little crispy, about 25 minutes.
I also always love to eat my pizza with Tapatio (hot sauce) and/or red chili flakes....so do it! I made a cucumber salad to go with this pizza (a recipe I found on blogspot) and it was not very impressive so I will spare you.
Picture from: http://www.geekologie.com/2007/12/02-week/
Monday, March 8, 2010
Warm Roasted-Potato Salad (emphasis on salad)
I love potato salad, all different types but my favorite kinds are usually vinegar based with no creaminess. I do have a special place in my stomach for the heart clogging creamy mayonnaise style potato salad...but it is unlikely that I will post one of that sort on my blog because do you think those are low fat? YEAH RIGHT! Haha plus they are inferior in my taste opinion. I decided to make this salad last night for a potluck that I was attending in honor of the Oscars. Sometimes potlucks can be so awkward and too many different types of food involved...but not this one. I had the wonderful company of two dear girlfriends, a puppy wiener dog and a fluff ball kitty. The salad also went extremely well with the other dinner items which were roasted chicken and cucumber salad. This salad is one that could stand on its own for a light dinner on a hot summer evening. The salad was sooo damn good I wanted to eat the whole bowl...but I had to share
Adapted from Sunset "myrecipes"
Serves 4 as a side dish
Ingredients
1 1/2 pounds small yellow potatoes, scrubbed and cut into bite size pieces
2 tablespoons olive oil
12 marinated artichoke hearts (about 2 jars), cut into bite size pieces and keep 2 tablespoons of marinade
1 tablespoon lemon juice
2 tablspoons red wine vinegar
1 tablespoon Dijon mustard
3 cups salad mix
1 tablespoon capers, drained
1 tablespoon chopped fresh tarragon
Salt and pepper
The Process
1. Scrub and cut potatoes into bite size pieces. Toss with 1 1/2 tablespoon of the olive oil and a couple pinches of salt, make sure all pieces are coated.
2. Heat oven to 400 degrees and put potatoes on a baking sheet. Bake the potatoes for 30minutes or until golden.
3. In the mean time, in a large salad bowl mix together remaining olive oil, lemon juice, red wine vinegar, Dijon mustard, capers, tarragon, and the 2 tablespoons of saved marinade from artichokes.
4. Cut up the artichoke hearts and tarragon, add to large salad bowl and mix.
5. When the potatoes are done, take out of oven and let sit for 7-10 minutes to slightly cool as to not wilt the salad mix.
6. Add potatoes to bowl and the salad mix. Season to taste with salt and pepper, but be aware that it is a naturally salty salad. Stir thoroughly and eat like crazy.
Note: And might I add some nutritional facts to make you feel great! Per serving: cal 86, fat 2.5g, protein 4.1g, and fiber 6.8...awesome...I know!
Picture from: http://www.ivillage.com/warm-roasted-potato-salad-artichokes/3-r-87147
Huevos Rancheros
Here is one of my own creations again. I decided late sunday morning...well perhaps it was noon already hehe...that I needed some huevos. My dad use to always make them for us as children and they were oh so tasty. I also often get huevos in restaurants if I go out for breakfast, it is one of my standbys. My other standbys are cornbeef hash, eggs benedict, chicken fried steak, and thanks to Helser's on Alberta St. potato pancakes! Anyways with a meal like this I can't even count the many ways to create them...so here is my version.
Serves 2
Ingredients
2 white corn tortillas
2 large eggs
1 1/2 ounces of goat cheese
1/2 can black beans with juice
1/2 tablespoon of garlic salt
1/2 tablespoon of cayenne pepper
Smart Balance (butter substitute)
Spray olive oil
Salsa
Sprinkle of cilantro
Tapatio
The Process
1. Put beans with juice in small saucepan over medium low heat.
2. Add garlic salt and cayenne pepper to beans and stir.
3. Heat 2 skillets one large and one medium. Spray the medium skillet with oil and turn to medium heat. Turn large skillet to medium high heat.
4. Spread smart balance sparingly on both tortillas front and back, then put into large skillet when hot and brown each side about 1minutes each side.
5. Add the 2 eggs to medium skillet when hot and cook to preference, in my case they were over easy, then set them aside.
6. When the tortillas are browned on both sides generously put goat cheese on each tortilla (still in skillet) and turn to medium heat until cheese slightly melts or becomes mushy about 4 minutes.
7. Beans are fully warmed up by this point, eggs are done and tortillas are ready.
8. Put tortilla on plate cheese side up. Put two big spoonfuls of black beans on tortilla. Next put egg on top of that.
9. You can then add a little salsa, tear up a bit of cilantro for the top, and of course I always add Tapatio to most breakfast items....so feel free to SPICE IT UP!
Note: if you are feeling really hungry you will want two to yourself....so double the recipe.
Picture from: http://www.andrew.cmu.edu/user/sahuber/rpd/Egg%20Drop.html
Prosciutto Goat Cheese Sandwich
This sandwich was inspired by another that I saw on the internet, but I changed it for the meat lovers. Also I do realize this is a little ridiculous to post a sandwich recipe when sandwiches are sooo easy to make, but I feel the amazingness needs to be shared. On saturday I decided to go on a very sunny hike with some friends and of course this worked up an appetite. We decided to go back to my house and have a picnic in the lawn and I knew it was the perfect time to make the sandwiches...which were a huge success and welcomed with open mouths. Once again since this is my recipe so no photo is available sorry.
Serves 3
Ingredients
1 multi-grain baguette
1 3-ounce package of goat cheese with herbs
1 4-ounce package of prosciutto
1 bunch of fresh basil
1 6-ounce jar marinated artichoke hearts
Pepper
The Process
1. Cut the baguette into 3 equal parts, and then slice each part in half (like a sandwich). Then put in toaster and toast till slightly crisp, but still soft when squeezed.
2. Take baguettes out of toaster and smear each side generously with goat cheese
3. Sprinkle a little pepper and salt (optional) on the cheese.
4. Cut the artichoke hearts into small bite size pieces and place on one side of the sandwich.
5. Add prosciutto 1-2 slices per sandwich.
6. Take the basil and tear up about 3 leaves per sandwich and place on sandwich.
7. Assemble by putting the sandwich halves together and bam sandwich heaven!
Picture from: http://www.bolognacookingschool.com/Dishes_and_Specialities/Prosciutto.php
Sunday, March 7, 2010
Spicy Asian style Shrimp
This is a recipe that I created woohoo! Because this is my own and I do not yet have a working digital camera there is not a picture to show off the dish. I will be getting a camera in June, so please be patient and know the pictures are coming. I might also add that the first time I used this marinade it was for tuna steaks and in that case you would just want to double the marinade. Anyways, I am constantly exploring the Asian food world with all their amazing spices, vinegars, and sauces. I mostly love Koren and Vietnamese foods and of course I like Japanese for their sushi. I recently went to this little Asian market on N Killingsworth called Lao Vieng. They had many treats and the ingredients I needed to make chicken pho for dinner that night. I might warn you though, upon entering get ready for a stinky fermenting fish smell...not so pleasant. This is also a very flexible recipe, depending on your favorite ingredient within the recipe add more of it for the personal touch. While I have only used this marinade for seafood, I do believe chicken and pork would also work well. Enjoy!
Serves 2 as a main dish.
Ingredients
2 cups large shrimp, (pre-cooked) thawed
2 tablespoons rice vinegar
2 1/2 tablespoons soy sauce
1/4 of a lime, squeezed for juice
1 1in. cube ginger, grated
1/2 of a Serrano pepper, minced
1/2 teaspoon Asian garlic chili sauce
2 cloves garlic, minced
1 tablespoon cilantro, chopped
1 tablespoon olive oil
The Process
1. In medium bowl add rice vinegar, soy sauce, lime juice, ginger, Serrano pepper, garlic chili sauce, garlic, and cilantro. Mix well.
2. Add thawed shrimp to bowl. Put in refrigerator to marinate for 1/2 hour. Marinating for 10 minutes works too, but is obviously not as tasty.
3. Pour oil in skillet and heat skillet over medium heat. Add shrimp and marinade to skillet and cook for 3 minutes or until hot.
Picture from: http://www.faqs.org/photo-dict/phrase/1117/shrimp.html
Green Bean and Radish Salad
I find myself always looking for new ways to make green beans, as they are one of my favorite vegetables. And I insist on eating radishes as well even though after consumption I burp radish flavor for hours (hope I didn't just ruin your appetite). This is a very simple recipe that pretty much goes with anything. Also while it is a hot salad I think it would be perfect for a hot summer night.
Adapted from Serious Eats.
Serves 2-3 as a side dish.
Ingredients
2 cups or 1/3 of the bag of Trader Joe's frozen haricot verts (green beans or any frozen green beans)
3 tablespoons olive oil
1/2 pound radishes, stem removed and quartered
3 cloves garlic, minced
1/2 teaspoon red pepper flakes
Salt and pepper
The Process
1. Steam green beans about 4 minutes or until al dente (firm), then rinse in cold cold water.
2. Pour oil into skillet and turn the heat to medium. When hot add radishes, green beans, garlic, and chili flakes to skillet. Cook about 5 minutes.
3. Season with salt and pepper
Picture from: http://www.seriouseats.com/recipes/2008/02/green-bean-and-radish-salad-recipe.html
Spicy Black Bean Cakes
As this is my first post and recipe, I felt it necessary to make something with cilantro. Though let it be noted that while I love cilantro and the blog is titled after it, not everything I make will have cilantro in it. So for the very few people out there that do not enjoy cilantro...don't worry you are not out of luck. I came across this recipe while working up on the hill at OHSU library and of course instead of doing my library school homework I was looking into my other passion FOOD which leads to food blogs. I thought this would be an awesome side dish to try and you could even make bigger cakes and have something similar to the ever so popular black bean burgers around these days. A vegetarian's dream...or so I would think, also a nice recipe to have around because I do in fact have quite of few of those herbivores in my life and I love to cook for them as well. As a child, I might add, I insisted that I was a carnivore so spicy black beans cakes would have never made it into my mouth...good thing people change haha. I also want to mention that while I am new to this formatting stuff my recipes are not categorized by color yet...but just you wait I will conquer the HTML world proving that I am learning something in library school hehe
I made the green bean and radish salad along with these cakes and it was very good. Sad to say I made the shrimp with these other two items as well. While the shrimp was good it did not go well with the cakes, so don't make the same mistake I did. Shrimp + cakes = blarg!
Adapted from serious eats.
Serves 2-3 as a side dish. Note: they look better than this picture.
Ingredients:
1 15-ounce can black beans, drained and rinsed
3 green onions (whole), sliced thinly
1/4 yellow onion, chopped finely
1/2 red bell pepper, seeded and chopped finely
1/4 cup cilantro
3 garlic cloves, minced
1/2 jalapeno, seeded and chopped finely
1 teaspoon ground cumin
1 small egg
1 tablespoon sriracha sauce (asian hot sauce)
1 tablespoon cornmeal (it is ok to be generous in order to make the mix thicken)
3 tablespoons olive oil
Salsa optional
The Process:
1. Put the black beans in a large bowl and coarsely mash them, a wooden spoon works great. Then add the green onions, yellow onion, bell pepper, cilantro, jalapeno, garlic, and cumin. Mix this up well and then add salt and pepper to taste.
2. Beat the egg with a fork and add to mixture. Add the cornmeal and mix well.
3. Take out two clean plates. Put a thin layer of cornmeal on one plate. Take about 2 tablespoons worth of the mix in hand and roll it into a ball on the plate with cornmeal, then set the ball aside on the other clean plate and slightly flatten with palm of hand to create a cake shape. Repeat this process with the rest of the mixture. Makes about 10 cakes.
4. Pour oil into a large skillet and set over medium heat. Add as many of the cakes as can comfortably fit in one layer. Cook for about 6 minutes a side. Be careful flipping the cakes because they are delicate and can fall apart easily. Put cakes on a plate with a paper towel to help soak up excess oil.
5. You can serve with salsa, avocados, pico de gallo, or anything your heart desires.
Picture from: http://www.limsakdakul.com/black_kidney_bean.html
Labels:
brown,
gluten free,
mexican,
side dish,
vegetarian
Subscribe to:
Posts (Atom)